Introduction
The Micro frontend architecture allows us to divide a web application into individual applications working loosely together. Each application, also known as a micro frontend, is an independent smaller module of the web application that can be build and run independently. These can be developed using different frameworks, allowing companies to leverage the expertise of team members specializing in different technologies.
Micro frontends are to frontend what micro services are to backend. They offer similar benefits like independent management and deployment of each module, reduced conflicts, and better fault isolation. They share the DOM of the application. One micro frontend's DOM should not be touched by another micro frontend, like how one backend microservice's database should not be touched by any microservice except the one that owns/controls it.
As the Micro frontend pattern is gaining popularity, many frameworks have come up that support their development. Some of the more prominent ones are :
- Single SPA framework
- Bit
- Module Federation
- Piral Framework
- Open Components Framework
In this blog, we will discuss about building micro frontends using the Single SPA framework and Qiankun ( another framework based on Single SPA ). Google Maps and Gmail use the Single SPA framework. Single SPA can be considered as a Javascript router for micro frontends. Here, each individual micro frontend has a life cycle. It can load, mount, and unmount from the DOM based on the application route.
Next, we will discuss the following
- Example Application
- Building example application using Single SPA
- Building example application using Qiankun
1. Example Application
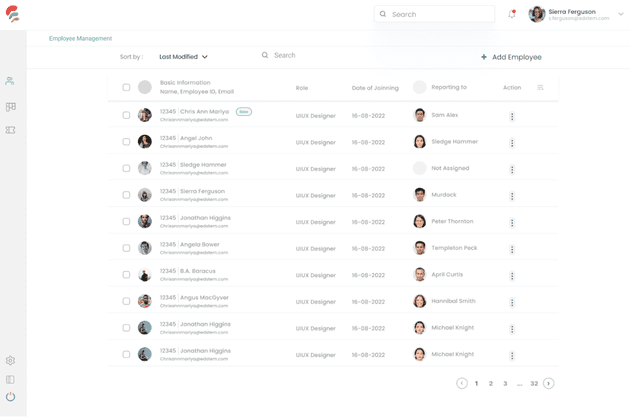
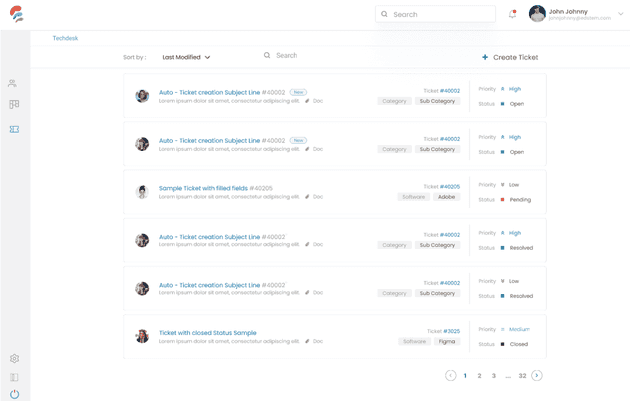
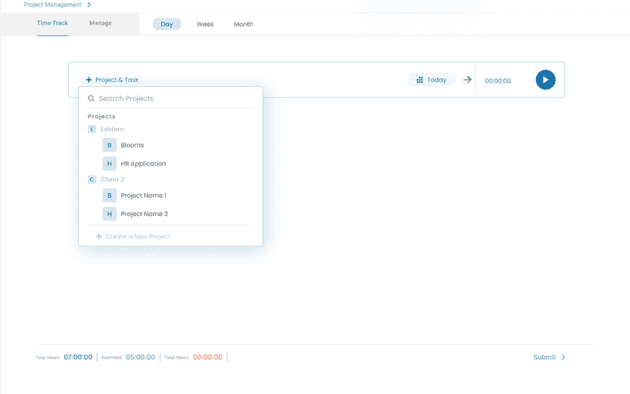
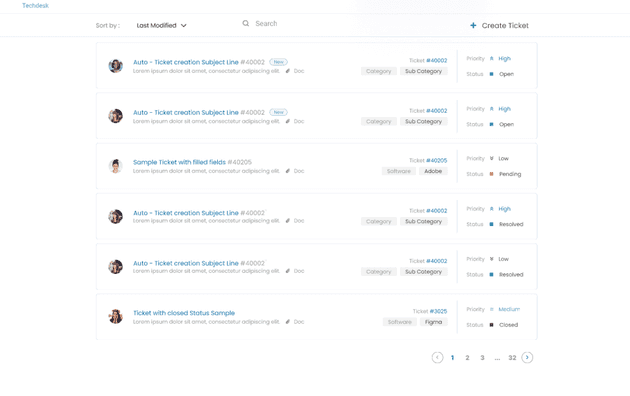
This HR application has features Employee Management, Project Management and Techdesk. Each of these features are built and run as a separate application. It can also be called and run from the main application. Choosing an icon from the left sidebar, redirects to different routes. Depending on the route, corresponding micro frontend is mounted.
1.1 HR Application (Complete web application which calls micro frontends)
1.2 Sidebar Application (Micro frontend)
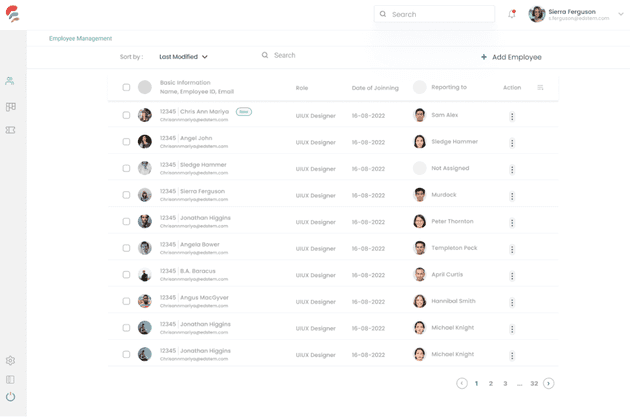
1.3 Employee Management Application (Micro frontend)
1.4 Project Management Application (Micro Frontend)
1.5 Techdesk Application (Micro Frontend)
As we can see from the images above, the applications can be run independently, as well as from within the HR application. Each of the applications can be developed using a different framework. They can be developed, maintained, and deployed separately by separate teams.
2. Single SPA
Single spa applications consist of a container or root config app and multiple applications. Root config app renders the HTML page and registers the applications. Applications share this HTML page; they do not have their own HTML page. Each application will mount and unmount depending on the activeWhen rule added while registering the application. Following applications will be created for the HR application hr-root hr-sidebar hr-employee hr-project hr-techdesk
2.1 Root App
2.1.1 First we need to install create-single-spa dependency.
Then we can run create-single-spa within the hr-root folder. We should choose the type ‘single spa root config.’ This creates a project with 2 files in src folder.
- root-config.js
- index.ejs
2.1.2 Applications must be registered in the root-config.js file
// Code snippet 1 – root-config.js
import { registerApplication, start } from "single-spa";
registerApplication(
  "@example/hr-sidebar",
  () => System.import("@example/hr-sidebar"),
  activeWhen: ["/"]
);
registerApplication({
  name: "@example/hr-employee",
  app: () => System.import("@example/hr-employee"),
  activeWhen: ["/employee"]
});
registerApplication({
  name: "@example/hr-project",
  app: () => System.import("@example/hr-project"),
  activeWhen: ["/project"]
});
registerApplication({
  name: "@example/hr-techdesk",
  app: () => System.import("@example/hr-techdesk"),
  activeWhen: ["/techdesk"]
});
start();
The activeWhen rule specifies the application route when the application will be mounted.
2.1.3 Within the index.ejs file we need to use import maps to get the applications. Single spa core team recommends using systemjs.
// Code snippet 2 – index.ejs
  <script type="systemjs-importmap">
    {
      "imports": {
        "react": "https://cdn.jsdelivr.net/npm/react@18.0.0/umd/react.production.min.js",
        "react-dom": "https://cdn.jsdelivr.net/npm/react-dom@16.13.0/umd/react-dom.production.min.js",
        "single-spa": "https://cdn.jsdelivr.net/npm/single-spa@5.3.0/lib/system/single-spa.min.js",
        "@example/root-config": "//localhost:9000/example-root-config.js",
        "@example/hr-sidebar": "http://localhost:8500/example-hr-sidebar.js",
        "@example/hr-employee": "http://localhost:8501/example-hr-employee.js ",
        "@example/hr-project": "http://localhost:8502/example-hr-project.js",
        "@example/hr-techdesk": "http://localhost:8503/example-hr-project.js"
      }
    }
  </script>
Within the same index.js file, we can create div tags with ids to specify where each app will be mounted.
// Code snippet  3 – index.ejs
<main>
    <div style ="display: flex" style="flex-direction: row" >
        <div id="sidebar-container"></div>
        <div id="app-container"></div>
    </div>
</main>
The sidebar application will be loaded in the div with id = "sidebar-container" The employee, project and techdesk application will be loaded, one at a time, within the div with id = "app-container"
2.2 Applications
2.2.1 We need to create an application folder for each of the applications. We can then run create-single-spa within each folder. This time we will choose the option "single-spa application/parcel" In framework, we will choose the framework that will be used to build the application. This creates a project with 3 files in src folder. Within the hr-sidebar folder it will create
- hr-sidebar.js
- root.component.js
- root.component.test.js
2.2.2 In the hr-sidebar.js file we need to wrap React, ReactDOM and the root component with single-spa-react (for react application). Similarly, if it is an angular application, it should be wrapped in single-spa-angular and so on. Also, we must export three lifecycle functions, bootstrap, mount and unmount. Bootstrap will be called only once when the child application is initialized, mount will be triggered every time the application is loaded. Unmount is called each time application is unloaded. domElementGetter function is optional and can be used to specify the dom element where the application will be mounted.
// Code snippet  4 - hr-sidebar.js
import React from "react";
import ReactDOM from "react-dom";
import singleSpaReact from "single-spa-react";
import Root from "./root.component";
const lifecycles = singleSpaReact({
  React,
  ReactDOM,
  rootComponent: Root,
  domElementGetter
});
export const { bootstrap, mount, unmount } = lifecycles;
function domElementGetter() {
  return document.getElementById("sidebar-container")
}
2.2.3 The root.component.js will have the application content. Here, we can return the App component which has the entire application.
// Code snippet  5 – root.component.js
import App from './App'
export default function Root(props) {
  return <App />;
}
The package.json has scripts for running the application in stand-alone mode or as a micro frontend application.
// Code snippet  6 – package.json
  "name": "@example/hr-sidebar",
  "scripts": {
    "start": "webpack serve",
    "start:standalone": "webpack serve --env standalone"
    …
Once all the applications are setup, we can run the root config application. The other applications will be loaded and depending on the application URL, they will be mounted or unmounted.
Since the hr-sidebar application is active whenever the "/" route is active, it will always be mounted and displayed in element with id = "sidebar-container"
Whenever the employee icon is chosen, application route will be /employee. The hr-employee application will be mounted and displayed in the element with id = "app-container."
Similarly, when project and techdesk icons are chosen, hr-project and hr-techdesk applications are mounted respectively. They will also be displayed in element with id = "app-container."
3. Qiankun
Qiankun is based on single-spa and aims to make the implementation easier.
Qiankun apps consist of a main application and multiple sub applications.
The sub applications are mounted and unmounted based on routes of the main application.
The main application must install qiankun dependency and register the sub applications.
Each sub application needs to export bootstrap, mount, and unmount, three lifecycle hooks, in its own entry javascript file. They also need to add some configuration to the application bundler. This is done so that main application can correctly identify information exposed by sub application.
3.1 Main application
3.1.1 After installing the qiankun dependency, at the entry point of the main application, we should register the sub applications.
// Code snippet 7 – index.js
import React from 'react';
import ReactDOM from 'react-dom';
import { registerMicroApps, start, setDefaultMountApp } from "qiankun";
import subApps from './sub-apps';

const root = ReactDOM.createRoot(document.getElementById('root'));
root.render(<App />);
registerMicroApps(subApps);
setDefaultMountApp("/employee");
start();
Setting of the default app to be mounted is optional.
3.1.2 The sub applications are defined as
// Code snippet 8 – subApps.js
const subApps = [
  {
    name: 'employee', // app name registered
    entry: //dev-employee/hr.com,
    container: '#subapp-container',
    activeRule: '/employee'
  },
{
    name: 'project', // app name registered
    entry: //dev-project/hr.com,
    container: '#subapp-container',
    activeRule: '/project'
  },
  {
    name: 'techdesk', // app name registered
    entry: //dev-techdesk/hr.com,
    container: '#subapp-container',
    activeRule: '/techdesk'
  },
];
export default subApps;
The microfrontends core team recommends that when we should only work with one micro frontend application in local at a time, rest should be already deployed. The Employee, Project and Techdesk application are already deployed in dev.
3.1.3 However, if we want to test the application before deploying, we can register the applications as below
// Code snippet 9 - subApps.js
const subApps = [
  {
    name: 'employee', // app name registered
    entry: //localhost:7001,
    container: '#subapp-container',
    activeRule: '/employee'
  },
{
    name: 'project', // app name registered
    entry: //localhost:7002,
    container: '#subapp-container',
    activeRule: '/project'
  },
  {
    name: 'techdesk', // app name registered
    entry: //localhost:7003,
    container: '#subapp-container',
    activeRule: '/techdesk'
  },
];
export default subApps;
From the main application whenever we go to the route /employee, employee application will be displayed in the element with id "subapp-container", when we go to route and so on.
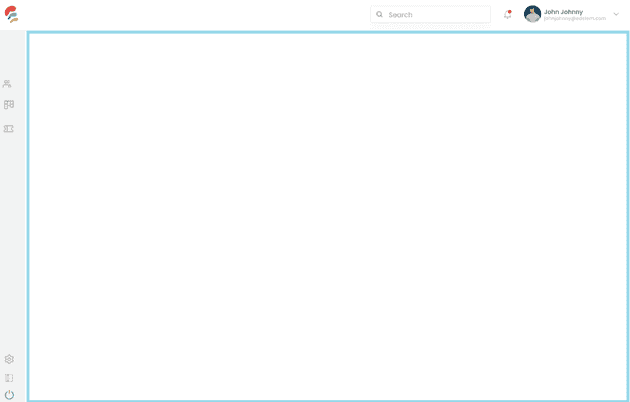
The html element with id = "subapp-container" is the area surrounded by blue border.
All sub applications whose activeRule matches the URL being called will be loaded there.
Note: The header and sidebar are part of the main application here.
3.2 Sub Applications
Note: We are considering only sub applications built with webpack (Vue, React, Angular)
For all applications with webpack, publicPath specifies the base path for assets within the application.
To make an application behave as a qiankun sub application, we need to modify the publicPath at runtime, such that it is the one provided by qiankun (i.e. the path of the main application).
3.2.1 We can create file public-path.js within src folder.
// Code snippet 10 – public-path.js
if (window.__POWERED_BY_QIANKUN__) {
  __webpack_public_path__ = window.__INJECTED_PUBLIC_PATH_BY_QIANKUN__;
}
3.2.2 Next, we need to import the public-path.js file right at the top of the entry file index.js. We also modify the ReactDOM. render and export the bootstrap, mount, and unmount functions.
// Code snippet 11
import './public-path';
import React from 'react';
import ReactDOM from 'react-dom';
import App from './App';

if (!window.__POWERED_BY_QIANKUN__) {
  ReactDOM.render(
      <App />
    document.getElementById('root')
  );
}
export async function bootstrap() {
  console.log('employee management bootstrapped');
}
export async function mount(props) {
  const { container } = props;
  ReactDOM.render(
    <App />,
    container ? container.querySelector('#root') : document.querySelector('#root')
  );
}
export async function unmount(props) {
  const { container } = props;
  ReactDOM.unmountComponentAtNode(
    container ? container.querySelector('#root') : document.querySelector('#root')
  );
}
3.2.3 Finally, we can modify the webpack configuration using @rescripts/cli or react-app-wired plugin.
Using react-app-wired plugin, the config modifications can be specified in config-overrides file in root directory.
All npm scripts in package.json can be modified to use react-app-rewired command instead of react-scripts.
// Code snippet 12 – config-overrides.js file
const { name } = require('./package.json');
module.exports = {
  webpack: (config) => {
    config.output.library = `${name}-[name]`;
    config.output.libraryTarget = 'umd';
    config.output.chunkLoadingGlobal = `webpackJsonp_${name}`;
    config.output.globalObject = 'window';
    return config;
  },
  devServer: (configFunction) => {
    return function (proxy, allowedHost) {
      const config = configFunction(proxy, allowedHost);
      config.open = false;
      config.hot = false;
      config.headers = {
        'Access-Control-Allow-Origin': '*'
      };
      return config;
    };
  }
};
// Code snippet 13 – package.json
"scripts": {
"start": "react-app-rewired start",
"build": "react-app-rewired build",
"test": "react-app-rewired test",
"eject": "react-scripts eject"
},Once the above setup is done, we can run the main application. Whenever the employee icon is chosen, it will go to the /employee route, and Employee Management application will run and be displayed in the element with id = "subapp-container."
Similarly, when project and techdesk icons are chosen it will run Project Management and Techdesk applications respectively.
Conclusion
The Micro frontend architecture can benefit teams greatly if they are working on large complex applications. However, careful planning is required to leverage its advantages. All microfrontends within an application should have consistent look and feel. If micro frontends need to communicate with each other, they can use custom props while registering the application. Teams developing different micro frontends need to regularly communicate with each other to prevent component or logic duplication.
Once the above points are taken care of, Micro frontends are a great way to increase efficiency and the turnaround time for adding new features.
References
https://single-spa.js.org/docs/getting-started-overview
https://qiankun.umijs.org/guide/getting-started
https://qiankun.umijs.org/guide/tutorial
